Alluring Emanations - Level 5
Faction: Rogue Drone
Mission Type: Encounter
Space Type: Deadspace
Damage Dealt: All
Recommended Damage Dealing: EM, Thermal
Single Pocket
No aggro on warp in.
Mission completes after destroying the first lone Rogue Drone.
Initial
1x (Rogue Drone) Trigger
Single Spawn
42x (Rogue Drone)
Showing posts with label Level 5. Show all posts
Showing posts with label Level 5. Show all posts
Thursday, January 28, 2021

Wednesday, January 27, 2021
The Big Sting L5 Amarr
The Big Sting - Level 5
The Big Sting (1 of 3)
Faction: Amarr
Mission Type: Deadspace - No Gate
Damage Dealt: EM / Therm
Recommended Damage Dealing: EM/Thermal
Mission Group:
4x Frigates (Divine Imperial Imran / Sixtus)(Web/Scrams)
6x Cruisers (Divine Imperial Justicar / Champion / Ambrose (Vamp))
6x Battleships (Imperial Templar Martyr)
Structures:
4x Tower Sentry Amarr III
2x Amarr Cruise Missile Battery
2x Amarr Energy Neutralizer Sentry III (Neuts)
Optional
Structure:
Ghost Ship: Approach to under 10km triggers wave 1
Wave 1:
6x Frigates (Divine Imperial Imran / Paladin / Valok)(triggers wave 2)
3x Cruisers (Divine Imperial Champion / Justicar)(triggers wave 4)
Wave 2
6x Battleships (Imperial Templar Martyr)(triggers wave 3)
Wave 3
3x Frigates (Divine Imperial Paladin)(Nabih / Sixtus)(Web/Scrams)
3x Battlecruisers (Imperial Templar Justicar / Champion)
4x Battleships (Imperial Templar Martyr / Ultara)
Wave 4
3x Battleships (Imperial Templar Martyr)(triggers wave 5)
Wave 5
2x Cruisers (Divine Imperial Justicar)
4x Battlecruisers (Imperial Templar Justicar / Champion)
4x Battleships (Imperial Templar Martyr / Ultara)
The Big Sting (2 of 3)
Faction: Amarr
Mission type: Deadspace, no initial gate
Damage dealt: EM/Therm
Recommended damage dealing: EM/Therm
Group 1:
5x Frigates (Divine Imperial Imran)(Web/Scrams)
Group 2:
7x Frigates (Divine Imperial Valok / Forian / Imran (Web/Scrams))
7x Cruisers (Divine Imperial Avenger / Equalizer / Justicar)
Group 3:
3x Destroyers (Imperial Templar Caius / Crusader)
7x Battleships (Imperial Templar Martyr / Ultara / Dominator)
Group 4:
3x Frigates (Divine Imperial Sixtus)(Web/Scrams)
3x Cruisers (Divine Imperial Ambrose / Basil)(Vamps)
5x Battleships (Imperial Templar Martyr)
Pocket 2
Group 1:
2x Frigates (Divine Imperial Imran / Sixtus)(Web/Scrams)
2x Cruisers (Divine Imperial Champion)
5x Battleships (Imperial Templar Dominator / Ultara / Imperial Dominator)
Group 2:
3x Battlecruisers (Imperial Champion)
5x Battleships (Imperial Templar Dominator / Martyr)
Group 3:
4x Frigates (Divine Imperial Felix / Nabih)(Web/Scrams)
6x Cruisers (Divine Imperial Justicar)(Ambrose / Basil)(Vamps)
3x Battlecruisers (Imperial Templar Justicar)
Group 4:
5x Battleships (Imperial Templar Martyr) orbits at 49km
Structure:
Citizen Quarters (Objective)
Pocket 3
Group 1:
5x Frigates (Divine Imperial Felix / Sixtus)(Web/Scrams)
7x Cruisers (Divine Imperial Champion / Justicar)(Ambrose / Basil)(Vamps)
Group 2:
3x Frigates (Divine Imperial Napat)(TD)
2x Cruisers (Divine Imperial Ambrose)(Vamps)
5x Battleships (Imperial Dominator / Martyr)
Group 3:
6x Battleships (Imperial Templar Martyr)
Group 4:
6x Frigates (Divine Imperial Paladin / Imran (Web/Scrams))
2x Cruisers (Divine Imperial Justicar)
2x Battleships (Imperial Templar Martyr)
The Big Sting (3 of 3)
The Big Sting L5 Caldari
The Big Sting - Level 5
The Big Sting (1 of 3)
Faction: Caldari
Mission Type: Deadspace, no gate
Damage Dealt: Kinetic 71% / Therm 29%
Recommended Damage Dealing: Kinetic/Thermal
Group:
4x Frigates (Taibu State Nagasa / Shinai)(Web/Scrams)
2x Cruisers (Taibu State Daimyo / Shugo)(ECM)
4x Cruisers (Taibu State Bajo / Samurai)
6x Battleships (State Shukuro Shogun)
Structure:
4x Tower Sentry Caldari III
2x Caldari Cruise Missile Battery
2x Caldari Energy Neutralizer Sentry III (Neuts)
Optional
Structure:
Ghost Ship (approach to under 10km from the Ghost Ship, triggers spawn)
Spawn:
6x Frigates (Taibu State Katana / Wakizashi)(Nagasa / Shinai)(Web/Scrams)(triggers wave 1)
3x Cruisers (Taibu State Bajo / Samurai)(triggers wave 3)
Wave 1
6x Battleships (State Shukuro Shogun)(triggers wave 2)
Wave 2
3x Frigates (Taibu State Shirasaya / Suriage)(Web/Scrams)
3x Battlecruisers (State Shukuro Bajo / Samurai)
4x Battleships (State Shukuro Bishamon / Shogun)
Wave 3
3x Battleships (State Shukuro Shogun)(triggers wave 4)
Wave 4
2x Cruisers (Taibu State Bajo / Samurai)
4x Battlecruisers (State Shukuro Bajo / Samurai)
4x Battleships (State Shukuro Bishamon / Shogun)
The Big Sting (2 of 3)
Faction: Caldari
Mission type: Deadspace, no initial gate
Damage dealt: Kinetic / Therm
Recommended damage dealing: Kinetic/Thermal
Group 1:
5x Frigates (Taibu State Nagasa / Shinai)(Web/Scrams)
Group 2:
7x Frigates (Taibu State Yari/Daito/Katana/Wakizashi)(Nagasa/Shinai)(Web/Scrams)
7x Cruisers (Taibu State Oni / Kanpaku / Bajo / Samurai)
Group 3:
3x Destroyers (State Shukuro Kamikazi / Choji)
7x Battleships (State Shukuro Shogun / Bishamon / Daijo)
Group 4:
3x Frigates (Taibu State Nagasa / Shinai)(Web/Scrams)
3x Cruisers (Taibu State Daimyo / Shugo)(ECM)
5x Battleships (State Shukuro Shogun)
Pocket 2
Group 1:
2x Frigates (Taibu State Nagasa / Shinai)(Web/Scrams)
2x Cruisers (Taibu State Bajo / Samurai)
5x Battleships (State Shukuro Shogun / Bishamon / Daijo / State Zen / Oshiro)
Group 2:
3x Battlecruisers (State Shukuro Bajo / Samurai / Kanpaku)
5x Battleships (State Shukuro Shogun)
Group 3:
4x Frigates (Taibu State Shirasaya / Suriage)(Web/Scrams)
6x Cruisers (Taibu State Bajo / Samurai)(Daimyo / Shugo)(ECM)
3x Battlecruisers (State Shukuro Bajo / Samurai)
Group 4:
5x Battleships (State Shukuro Daijo / Shogun / State Zen)
Pocket 3
Group 1:
5x Frigates (Taibu State Nagasa / Shinai)(Web/Scrams)
7x Cruisers (Taibu State Bajo / Samurai)(Daimyo / Shugo)(ECM)
Group 2:
3x Frigates (Taibu State Nagasa / Shinai)(Web/Scrams)
2x Cruisers (Taibu State Daimyo / Shugo)(ECM)
5x Battleships (State Shukuro Bishamon / Shogun)
Group 3:
6 x Battleships (State Shukuro Bishamon / Shogun)
Group 4:
6x Frigates (Taibu State Katana / Wakizashi)
2x Cruisers (Taibu State Bajo / Samurai)
2x Battleships (State Shukuro Shogun)
The Big Sting (3 of 3)
Faction: Caldari
Mission Type: Encounter
Space Type: Normal Space, No Gates
Damage Dealt: Kin / Therm
Recommended Damage Dealing: Kin / Therm
Group 1:
1x Carrier (State Izanaki)(Vamps)
8x Fighters (State Fighter)
Wave 1 (time delay spawn)
14 x Frigates (Taibu State Katana / Wakizashi)(Nagasa/Shinai)(Web/Scrams)
12 x Battleships (State Shukuro Shogun/Bishamon)
At 50% shields, triggers wave 2 and
5 x Fighters (State Fighter)
8 x Fighters (State Fighter)
At 10% Shields
5x Fighters (State Fighter)
At 10% Armor
5x Fighters (State Fighter)
At 50% Structure
5x Fighters (State Fighter)
Wave 2
1x Carrier (State Izanaki)(Vamps)
At 40% Shields
5x Fighters (State Fighter)
At 50% Armor
5x Fighters (State Fighter)
At 10% Armor
5x Fighters (State Fighter)
At 50% Structure
5x Fighters (State Fighter)
Breeding Facility
Breeding Facility - Level 5
Faction: Amarr
Mission Type: Encounter
Space Type: Deadspace, no gates
Damage Dealt: EM/Therm
Recommended Damage Dealing: EM/Therm
Single Pocket
Group:
6x Frigates (Divine Imperial Napat)(TD)
12x Destroyer (Imperial Templar Caius / Crusader)
Structure:
16x Amarr Cruise Missile Batteries
2x Amarr Stasis Tower (Webs)(trigger wave 1)
4x Amarr Energy Neutralizer Sentry III (Vamps)(trigger wave 2)
Breeding Facilities (trigger wave 3)
Delay Spawn
2x Battleships (Imperial Templar Martyr)
3x Amarr Slave Transport Ships
Wave 1
2x Battlecruisers (Imperial Templar Justicar)
1x Battleship (Imperial Templar Martyr)
Wave 2
3x Cruiser (Divine Imperial Champion / Justicar)
2x Battlecruiser (Imperial Templar Justicar)
Wave 3
3 x Battleships (Imperial Templar Dominator / Martyr)
Caldari Beacons
Caldari Beacons - Level 5
Faction: Caldari
Mission Type: Encounter
Space Type: Deadspace w/Gate
Damage Dealt: Kin/Therm
Recommended Damage Dealing: Kin/Therm
Pocket 1
Group:
2x Frigates (Taibu State Tachi)(ECM)
2x Cruisers (Taibu State Shugo)(ECM)
4x Battlecruisers (State Shukuro Seki)
7x Battleships (State Shukuro Nagashin / Turushima (Vamps, ECM))
Structure:
2x Caldari Energy Neutralizer Sentry III (Vamps)
Pocket 2
Group:
3x Frigates (Taibu State Wakizashi)
5x Cruisers (Taibu State Bajo / Samurai)
8x Battleships (State Shukuro Nagashin)
Structure:
4x Caldari Cruise Missile Batteries
2x Caldari Energy Neutralizer Sentry IIIs (Vamps)
3x Subspace Beacon (on each destruction, triggers one of the waves (1 to 3))
Wave 1
8x Battleships (State Shukuro Shogun) orbits at 33k
Wave 2
6x Battleships (State Shukuro Turusima) orbits at 23k
Wave 3
6x Battleships (State Shukuro Nagashin) orbits at 68k
Cleaning House
Cleaning House - Level 5

Faction: Sansha’s Nation
Mission Type: Encounter
Space Type: Deadspace, no gates
Damage Dealt: EM/Therm
Recommended Damage Dealing: EM/Therm
Group:
24x Frigates (Centii Loyal Butcher / Manslayer)(triggers wave 1-7)
Structure:
8x Tower Sentry Sansha III
4x Sansha Stasis Tower (Webs)
2x Sansha Energy Neutralizer Sentry III (Vamps)
1x Sansha Outpost (triggers reinforcement when reduced to 50% shields)
Reinforcements:
3x Battlecruisers (Centatis Phantasm)
3x Battleships (Centus Dread Lord)
Wave 1
3x Cruisers (Centum Loyal Mutilator)
3x Battlecruisers (Centatis Behemoth)
Wave 2
8x Sansha Sentry Guns (spawn 2 at a time at the outpost)
Wave 3
2x Battlecruisers (Centatis Wraith)
Wave 4
1x Cruiser (Centum Loyal Juggernaut)(TD)
3x Battleships (Centus Dread Lord / Tyrant)
Wave 5
4x Cruisers (Centum Loyal Slaughterer)(Juggernaut / Execrator)(TD)
3x Battleships (Centus Tyrants)
Wave 6
2x Battleships (Dread Lords)
Wave 7
2x Cruisers (Centum Loyal Slaughterer)
1x Battleship (Centus Tyrant)
Additional waves on destroying some Cruisers, Battlecruisers and Battleships:
Wave 8
1x Cruisers (Centum Loyal Juggernaut)(TD)
2x Battleships (Centus Dread Lord)
Wave 9
4x Battlecruisers (Centatis Specter)
4x Battleships (Centus Dread Lord)
Cleansing Fire
Cleansing Fire - Level 5
Faction: Amarr
Mission Type: Encounter
Space Type: Deadspace, no gate
Damage Dealt: EM/Therm
Recommended Damage Dealing: EM/Therm
Group:
3x Cruisers (Divine Imperial Champion / Justicar)(Ambrose)(Vamps)
2x Battlecruiser (Imperial Templar Champion / Justicar)
1x Battleship (Imperial Templar Martyr)(triggers waves 2,3,4)
Structure:
2x Amarr Stasis Towers (Webs)(triggers reinforcements 1)
2x Amarr Energy Neutralizer Sentry IIIs (Vamps)
1x Cathedral
Reinforcements 1
Structure:
5x Amarr Heavy Missile Batteries
8x Amarr Heavy Missile Batteries
8x Amarr Cruise Missile Batteries (triggers reinforcement 2)
Reinforcement 2
1x Battleship (Amarr Navy Apocalypse) orbits at 4km, Web/Scramble
Structure:
?x Cathedral Cruise Missile Batteries (triggers additional spawn)
2x Frigates (Divine Imperial Sixtus / Paladin / Valok)(Web/Scrams)
2x Frigates (Divine Imperial Imran / Napat)(Web/Scrams)
1x Cruiser (Divine Imperial Ambrose)
2x Frigates (Divine Imperial Imran / Sixtus / Amarr Navy Gamma I Support Frigate)(Web/Scrams)
Wave 2
When Martyr Battleship is reduced to 70% Shields these spawns 60km above the Cathedral
Structure:
4x Amarr Cruise Missile Batteries
1x Amarr Energy Neutralizer Sentry II (Vamps)
Wave 3
When Martyr Battleship is reduced to 90% Armor there spawns 60km below the Cathedral
Structure:
4x Amarr Cruise Missile Batteries
1x Amarr Energy Neutralizer Sentry II (Vamps)
Wave 4
Destroying Martyr Battleship spawns
3x Battleships (Imperial Templar Martyr)
Wave 5
3x Battleships (Imperial Templar Martyr) orbits at 49km
Wave 6
Triggers on attacking Energy Neutralizer Sentry III
3x Frigates (Divine Imperial Imran / Sixtus)(Web/Scrams)
3x Cruisers (Divine Imperial Justicar)(Ambrose / Basil)(Vamps)
2x Battleships (Divine Imperial Martyr)
Wave 7
Triggers on attacking Energy Neutralizer Sentry III
2x Cruisers (Divine Imperial Champion/Justicar)
3x Battlecruisers (Imperial Templar Champion/Justicar)
2x Battleships (Imperial Templar Martyr/Torah)
Codename: Redress
Codename: Redress - Level 5

Faction: Minmatar
Mission Type: Encounter
Space Type: Deadspace with gates
Damage Dealt: Exp
Recommended Damage Dealing: Exp
Special Equipment: Need at least one ship with Data Analyzer, and ship with 2000m3 cargo space
Pocket 1
Structure:
7x Minmatar Stasis Tower (Webs)
6x Minmatar Cruise Battery
3x Tower Sentry Minmatar III
4x Minmatar Neut Tower III (Vamps)
Pocket 2
Group:
11x Frigate (Republic Hrakt / Takan / Gleeda / Ivan) - Ivan web/scram
6x Cruiser (Republic Orka / Pafi / Jarpur)
6x Battlecruiser (Republic Venis / Nutia / Norn)
10x Battleship (Republic Ymir / Jotun / Pytara)
Structure:
4x Minmatar Cruise Battery
2x Tower Sentry Minmatar III
5x Databank (Each successful can hack spawns 2 frigs or inflicts about 400 dmg)
Pocket 3
Group:
4x Battlecruiser (Republic Norn / Nutia)
5x Battleship (Republic Jotun / Sigur)(Ymir)(Target Paints)
Structure:
2x Minmatar Cruise Battery
6x Tower Sentry Minmatar III
4x Minmatar Neut Tower III (Vamps)(spawns another sentry)
4x Databank (4th can hacked triggers 4x Frig / 4x BC / 2x Cruiser)
Pocket 4
Group:
4x Frigate (Republic Gleeda)(Target Paints)(triggers wave 1)
8x Cruiser (Republic Rodul / Jarpur / Orka)(triggers wave 2)
1x Battelcruiser (Republic Venis)
6x Battleship (Republic Ymir / Sigur / Jotun)(triggers wave 3)
Wave 1:
2x Frigate (Chief Republic Ivan)(Web/Scrams)
Wave 2:
4x Battlecruiser (Republic Norn)
Wave 3:
3x Battleship (Republic Ymir)(Target Paints)
Structure:
6x Databank
Convoy Attack Gallente
Convoy Attack - Level 5

Faction: Gallente Federation
Mission Type: Encounter
Space Type: Deadspace w/Gate
Damage Dealt: Therm/Kin
Recommended Damage Dealing: Kin/Therm
Objective
Destroy all enemy vessels.
Single Pocket
Group:
3x Frigates (Elite Federation Matara)(Web/Scrams/Damp)
4x Freighters (Federation Freighter)
17x Battleships (Federation Praktor Hexeris / Hyperion / Phanix / Polemo)(Dionia)(Vamps, Damps)
Convoy Attack Minmatar
Convoy Attack - Level 5
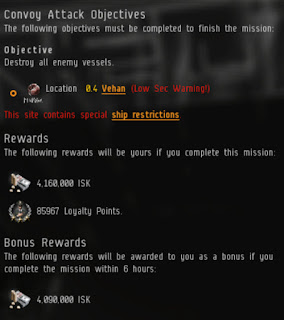
Faction: Minmatar Republic
Mission type: Encounter
Space type: Deadspace w/gate
Damage dealt: Exp/Em/Kin/Therm
Recommended damage dealing: Explosive
Single Pocket
Group:
3x Frigates (Chief Republic Gleeda)(Target Paints)
4x Freighters (Republic Freighter)
17x Battleships (Republic Tribal Akila (Vamps, Target Paints) / Jarl / Kinai / Pytara (Target Paints) / Sigur / Ymir)
Convoy Attack Amarr
Convoy Attack - Level 5
Faction: Amarr
Mission Type: Deadspace w/gate
Damage Dealt: EM/Therm
Recommended Damage Dealing: EM/Therm
Pocket 1
Group:
4x Frigates (Divine Imperial Napat)(Web/Scrams)(TD)
4x Freighters (Imperial Freighters)
17 x Battleships(Imperial Templar Judgment / Torah / Dominator / Martyr)(Diviner (Vamps, TD))
Convoy Attack Caldari
Convoy Attack - Level 5
Faction: Caldari
Mission Type: Deadspace, Gated
Damage Dealt: Kin/Therm
Recommended Damage Dealing: Kin/Therm
Pocket 1
Group:
3x Frigate (Taibu State Tachi)(Web/Scrams/ECM)
4x Freighter (State Freighters)
17x Battleship (State Shukuro Nagashin / Taisho / Tenno / Shogun / Bishamon)(Turushima (Vamps))
Crush the Sebiestor Station
Crush the Sebiestor Station - Level 5

Faction: Minmatar
Mission Type: Encounter
Space Type: Deadspace w/gates
Damage Dealt: Omni
Recommended Damage Dealing: Explosive
Objective
Destroy the enemy base and all enemy ships.
Pocket 1
Group 1:
4x Frigate (Chief Republic Magni / Ivan)(Web/Scrams)
3x Cruiser (Chief Republic Orka / Jarpur)
5x Battleships (Republic Tribal Sigur / Jarl / Jotun)(trigger)
Group 2:
3x Frigate (Chief Republic Ivan)(Web/Scrams)
10x Cruiser (Chief Republic Pafi / Orka / Tenar / Jarpur)
Pocket 2
Group 1:
9x Battleship (Republic Tribal Jarl / Ymir / Sigur)
Structure:
10x Minmatar Cruise Missile Battery
4x Minmatar Stasis Tower (Webs)
4x Minmatar Energy Neutralizer Sentry III (Vamps)
Group 2:
5x Frigate (Chief Republic Ivan / Magni)(Web/Scrams)
5x Cruiser (Chief Republic Orka / Manadis / Rodul)
10x Battleship (Republic Tribal Jotun / Sigur / Ymir)
Structure:
4x Minmatar Energy Neutralizer Sentry III (Vamps)
Deadly Serious
Deadly Serious - Level 5
Faction: Gallente Federation
Mission Type: Encounter
Space Type: Deadspace
Damage Dealt: Kin/Therm
Recommended damage dealing: Kin/Therm
Pocket 1
Group:
10x Battleship (Federation Praktor/Pith-type)(triggers wave 1)
Wave 1:
7x Battleship ("Decloaked" Federation battleships)
Pocket 2
Group:
8x Frigate (Lixa / Matar / Phalarica)(Web/Scram/Damps)
14x Battleship (Praktor Hyperion / Praktor Hexeris / Praktor Phanix / Prak Nav Prae)
Reinforcement:
3x Frigate (Matara)(Web/Scram/Damps)
6x Battlecruiser (Pith Death Dealer / Pith Assassin)
22x Battleship (Helepolis / Nav Longa / Prak Nav Prae / Xenan / Covinus / Prak Praeses / Prak Phanix)
Destroy the Ammatar Base
Destroy the Ammatar Base - Level 5
Faction: Amarr
Mission type: Deadspace
Damage Dealt: EM/Therm
Recommended Damage Dealing: EM/Therm
Warp-In
Initial Group
4x Frigate (Divine Imperial Imran/Sixtus)(Web/Scrams)
3x Cruiser (Divine Imperial Champion/Justicar)
5x Battleship (Imperial Templar Dominator/Ultara/Torah*)(triggers spawn 1)
?x Battleship (Imperial Ultara/Martyr*)
Spawn 1
3x Frigate (Divine Imperial Imran / Sixtus)(Web/Scrams)
10x Cruiser (Divine Imperial Ambrose / Basil / Champion / Justicar)
Pocket 2
Initial Group
9x Battleship (Imperial Templar Martyr / Torah)(Imperial Ultara / Martyr)
Structure:
4x Amarr Statis Towers (Webs)
10x Amarr Cruise Missile Batteries (triggers spawn 1)
Spawn 1
Each of the first two Missile Batteries destroyed spawns 2 Neuts each.
Structure:
4x Amarr Energy Neutralizer Sentry III (Vamps)
Spawn 2
Triggered When Raider Outpost (Objective) is reduced to 20% Shields
6x Frigate (Divine Imperial Imran / Sixtus)(Web/Scrams)
5x Cruiser (Divine Imperial Avenger / Champion / Justicar)
10x Battleship (Imperial Templar Dominator / Ultara / Martyr)
Structure:
4x Amarr Energy Neutralizer Sentry IIIs (Vamps)
Destroy the Caldari Outpost
Destroy the Caldari Outpost - Level 5
Faction: Caldari
Mission Type: Encounter
Space Type: Gated Deadspace
Damage Dealt: Kin/Therm
Recommended Damage Dealing: Kin/Therm
Pocket 1
Group
1-6x Frigate (Web/Scrams/ECM)
4-8x Cruiser
3-9x Battleship (triggers wave 1)
Structure:
4-6x Cruise towers
2-4x Neut towers (Vamps)
2-4x Stasis towers (Webs)
Wave 1
6-8x Cruiser
4-8x Frigate
Pocket 2
Group:
9x Battleships (State Shukuro Shogun/Taisho/Tenno)
Structure:
10x Cruise Missile Battery
4x Stasis Tower (Webs)(Each triggers one additional Neut tower)
1x Outpost (triggers wave 1 on shield damage)
Reinforcement:
4x Caldari Energy Neutralizer Sentry III (Vamps)
Wave 1:
6x Frigate (Taibu State Nagasa / Shinai)(Web/Scrams)
5x Cruiser (Taibu State Samurai / Kanpaku / Bajo)
10x Battleship (State Shukuro Shogun / Bishamon)
4x Caldari Energy Neutralizer Sentry III (Vamps)
A Dirty Job
A Dirty Job - Level 5
Faction: Minmatar / Mercenaries
Mission Type: Encounter
Space Type: Deadspace
Damage Dealt: Omni
Recommended Damage Dealing: Exp/Therm
Group:
1x Carrier (Republic Harkal)(Vamps)
Reinforcements
Shooting the Carrier will spawn
5x Fighter (Republic Fighter)
Each original Fighter will replace itself 8 more times if destroyed
40x more Fighter (Republic Fighter)
At 90% Armor there spawns:
3x Frigate (Mercenary Elite Fighter)(triggers 3 more)
3x Frigate (Mercenary Elite Fighter)
7x Cruiser (Mercenary Commander) (triggers 2 Corporals)
2x Cruiser (Mercenary Corporal)
1x Battleship (Mercenary Overlord)
At 50% Armor there spawns:
4x Frigate (Mercenary Elite Fighter)(triggers 3 more)
3x Frigate (Mercenary Elite Fighter)
7x Cruiser (Mercenary Commander)(triggers 3 Corporals)
3x Cruiser (Mercenary Corporal)
1x Battleship (Mercenary Overlord)
At 10% Armor there spawns:
3x Frigate (Mercenary Elite Fighter)(triggers 3 more)
3x Frigate (Mercenary Elite Fighter)
7x Cruiser (Mercenary Commander)(triggers 2 Corporals)
2x Cruiser (Mercenary Corporal)
1x Battleship (Mercenary Overlord)
At 90% Structure there spawns:
1x Frigate (Mercenary Elite Fighter)(triggers 4 more)
4x Frigate (Mercenary Elite Fighter)
7x Cruiser (Mercenary Commander)(triggers 5 Corporals)
5x Cruiser (Mercenary Corporal)
1x Battleship (Mercenary Overlord)
At 50% Structure there spawns:
2x Frigate (Mercenary Elite Fighter)(triggers 4 more)
4x Frigate (Mercenary Elite Fighter)
3x Cruiser (Mercenary Commander)(triggers 3 Corporals)
3x Cruiser (Mercenary Corporal)
3x Battleship (Mercenary Overlord)
Fate of Angels
Fate of Angels - Level 5

Faction: Angel Cartel
Mission Type: Encounter
Space Type: Deadspace
Damage Dealt: Exp/Kin
Recommended Damage Dealing: Exp/Kin
Objective
Blow up the Battlestation and any Angel Cartel ships you encounter.
Single Pocket
Group:
15x Cruisers (Arch Gistum Centurion / Liquidator / Marauder)(Crusher / Smasher)(Target Paints)
11x Battlecruisers (Gistatis Legatus / Tribunus)
4x Battleships (Gist Cherubim / Seraphim)
Structure:
4x Tower Sentry Angel III
5x Angel Cruise Missile Batteries
1x Angel Stasis Tower (Webs)
1x Angel Energy Neutralizer Sentry III (Vamps)(triggers)
1x Angel Battlestation (triggers waves 1 at 95% Shields, at 20% Armor wave 2, at 30% Structure wave 3)
Group 2
4-6x Frigates (Gistii Ambusher/Arch Gistii Outlaw/Thug)(Web/Scrams)
Wave 1
6x Frigates (Arch Gistii Impaler)(Web/Scrams)
Wave 2
4x Cruisers (Arch Gistum Liquidator)
4x Battlecruisers (Gistatis Legatus)
Wave 3
3x Cruisers (Arch Gistum Defeater)
3x Battleships (Gist Seraphim)
Additional Reinforcements triggers:
Attacking the (3) Repair Outposts, each spawn:
2x Faction Battleships (Gist Domination Saint / Nephilim)
Attacking Energy Neutralizer Sentry spawns:
3x Frigates (Arch Gistii Ambusher)(Web/Scrams)
3x Cruisers (Gistum Centurion)
Finders and Keepers
Finders and Keepers - Level 5
Faction: Gallente Federation
Mission Type: Encounter
Space Type: Normal space
Damage Dealt: Therm/Kin
Recommended Damage Dealing: Kin/Therm
N/A
Faction: Gallente Federation
Mission Type: Encounter
Space Type: Normal space
Damage Dealt: Therm/Kin
Recommended Damage Dealing: Kin/Therm
N/A
Forces Amassing
Forces Amassing - Level 5
Faction: Amarr
Mission Type: Encounter
Space Type: Deadspace w/gate
Damage Dealt: EM/Therm
Recommended Damage Dealing: EM/Therm
Single Pocket
Structure:
3x Amarr Cruise Missile Battery
3x Amarr Energy Neutralizer II
2x Amarr Heavy Missile Battery
Group 1:
2x Cruiser (Imperial Templar Champion)
6x Cruiser (Imperial Justicar)(triggers wave 1)
Group 2:
6x Battleship (Imperial Templar Judgment)(triggers wave 2)
Wave 1:
2x Cruiser (Imperial Templar Champion)
4x Cruiser (Imperial Justica)(triggers wave 3)
Wave 2:
7x Battleship (Imperial Templar Martyr)(triggers wave 4)
Wave 3:
6x Cruiser (Imperial Templar Phalanx)
Wave 4:
4x Battleship (Imperial Templar Dominator)
2x Battleship (Imperial Templar Martyr)
Subscribe to:
Posts (Atom)